How I Slice Prompts for Animation in Spine

Today I want to share how I prepare 2D assets for animation in Spine.
I know, there’s nothing super-secret about asset prep, but maybe my workflow will help someone out there or at least be fun to look at :)
A quick disclaimer: this is how WE work with animator.
Other people might have different workflows or rules, and that’s totally fine.
But we’re always open to tips.
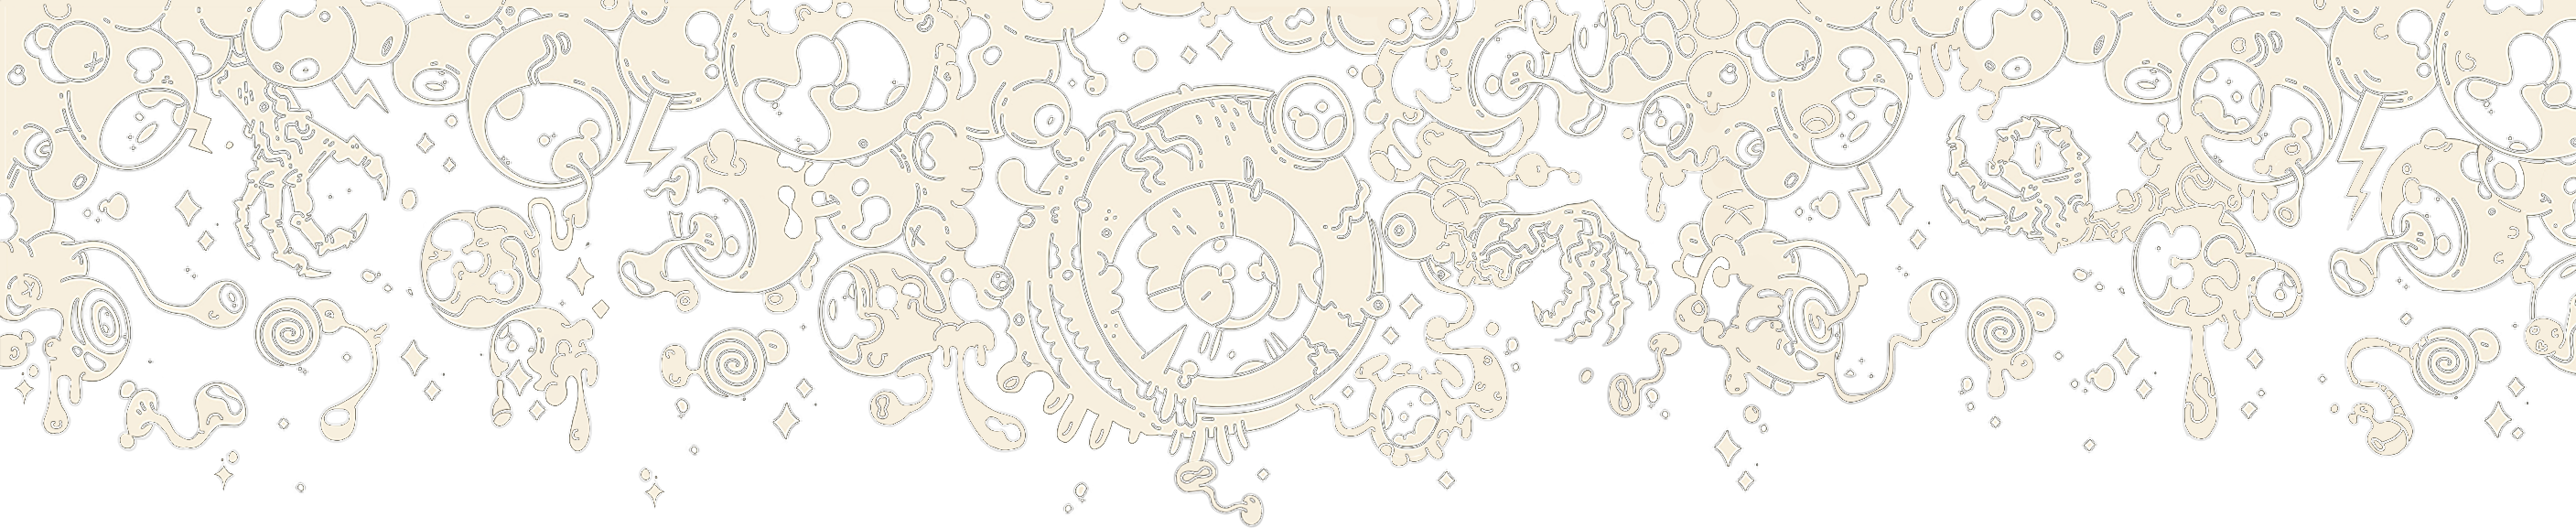
I always send to animator a fully assembled PSD, so they can see how the final character should look. If I just dumped a folder full of PNGs, they’d have to spend ages piecing it together like a puzzle, not fun for either of us.
Here’s what the PSD looks like:
Note for beginner artists:
If you already know your character will be animated - draw it on separate layers from the start!
Cutting up a finished flat illustration later takes forever. It’s basically redoing the artwork from scratch.
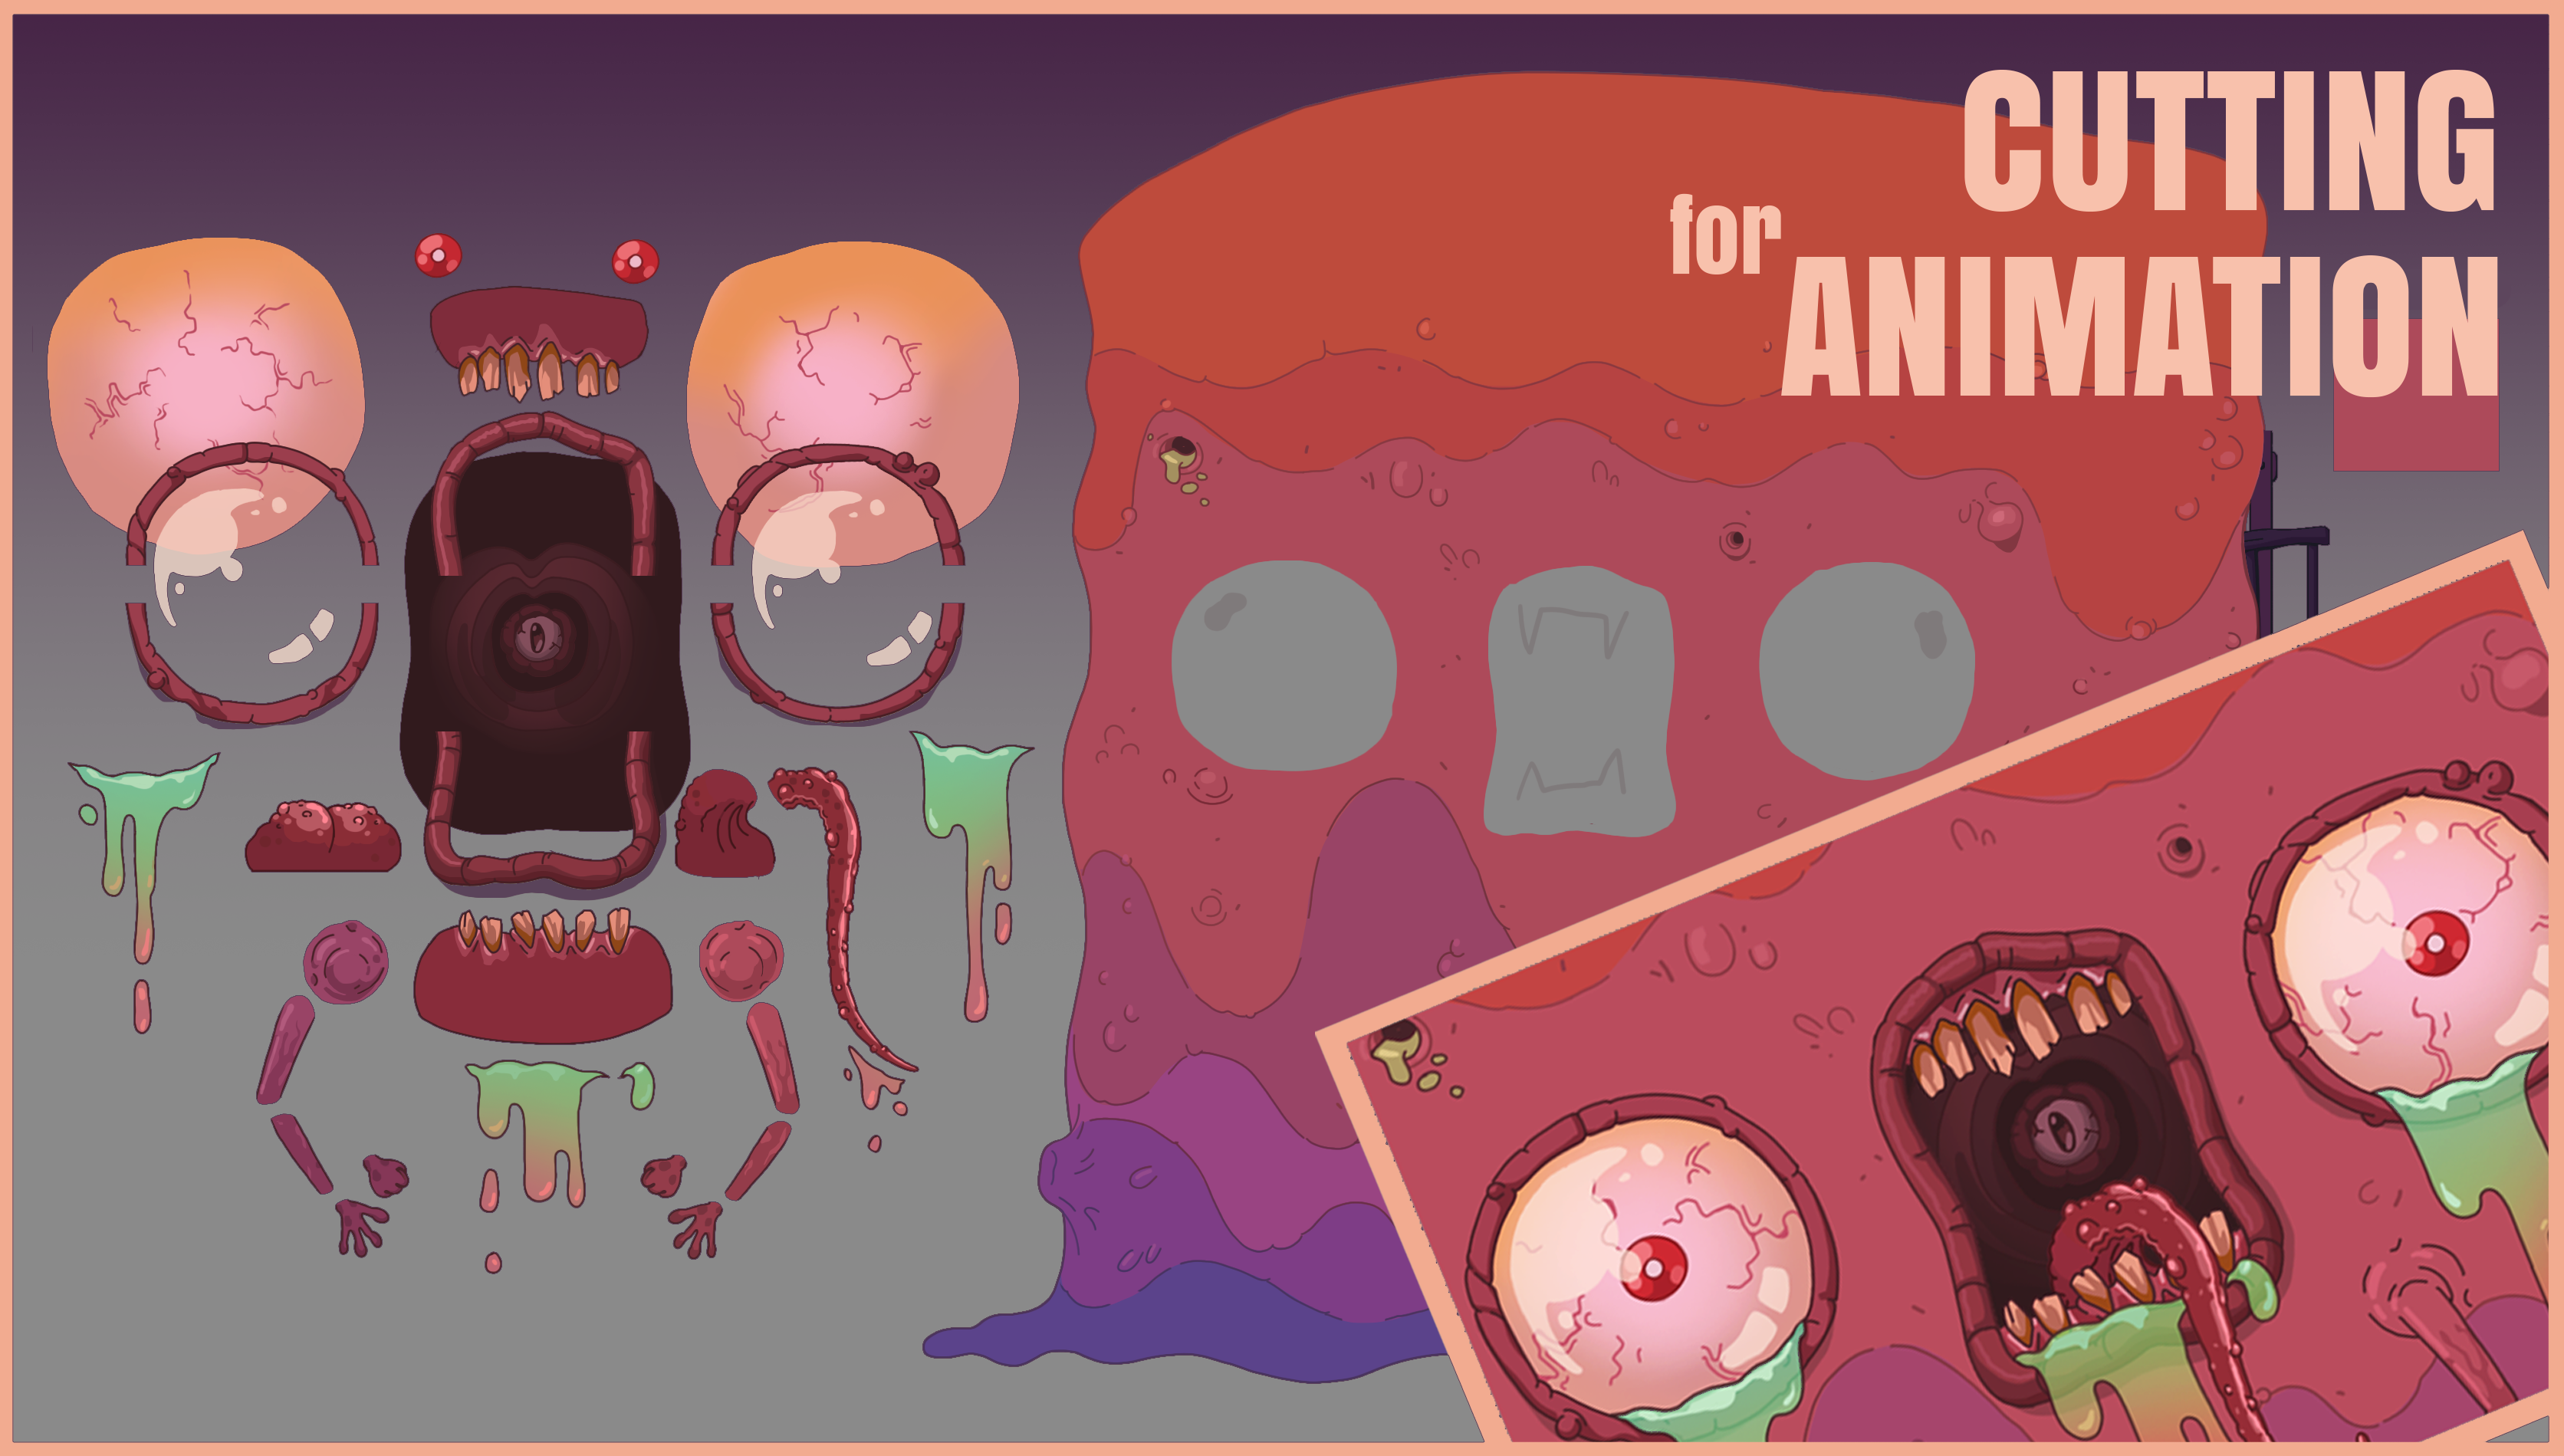
For clarity, I’ll show you what it looks like layer by layer.
First, I decide what sits behind the body and what goes in front.
Eyeballs and the throat will be visible through openings, so those edges don’t have to be perfect.
Everything else sits on top, and that’s where the real detailing begins.
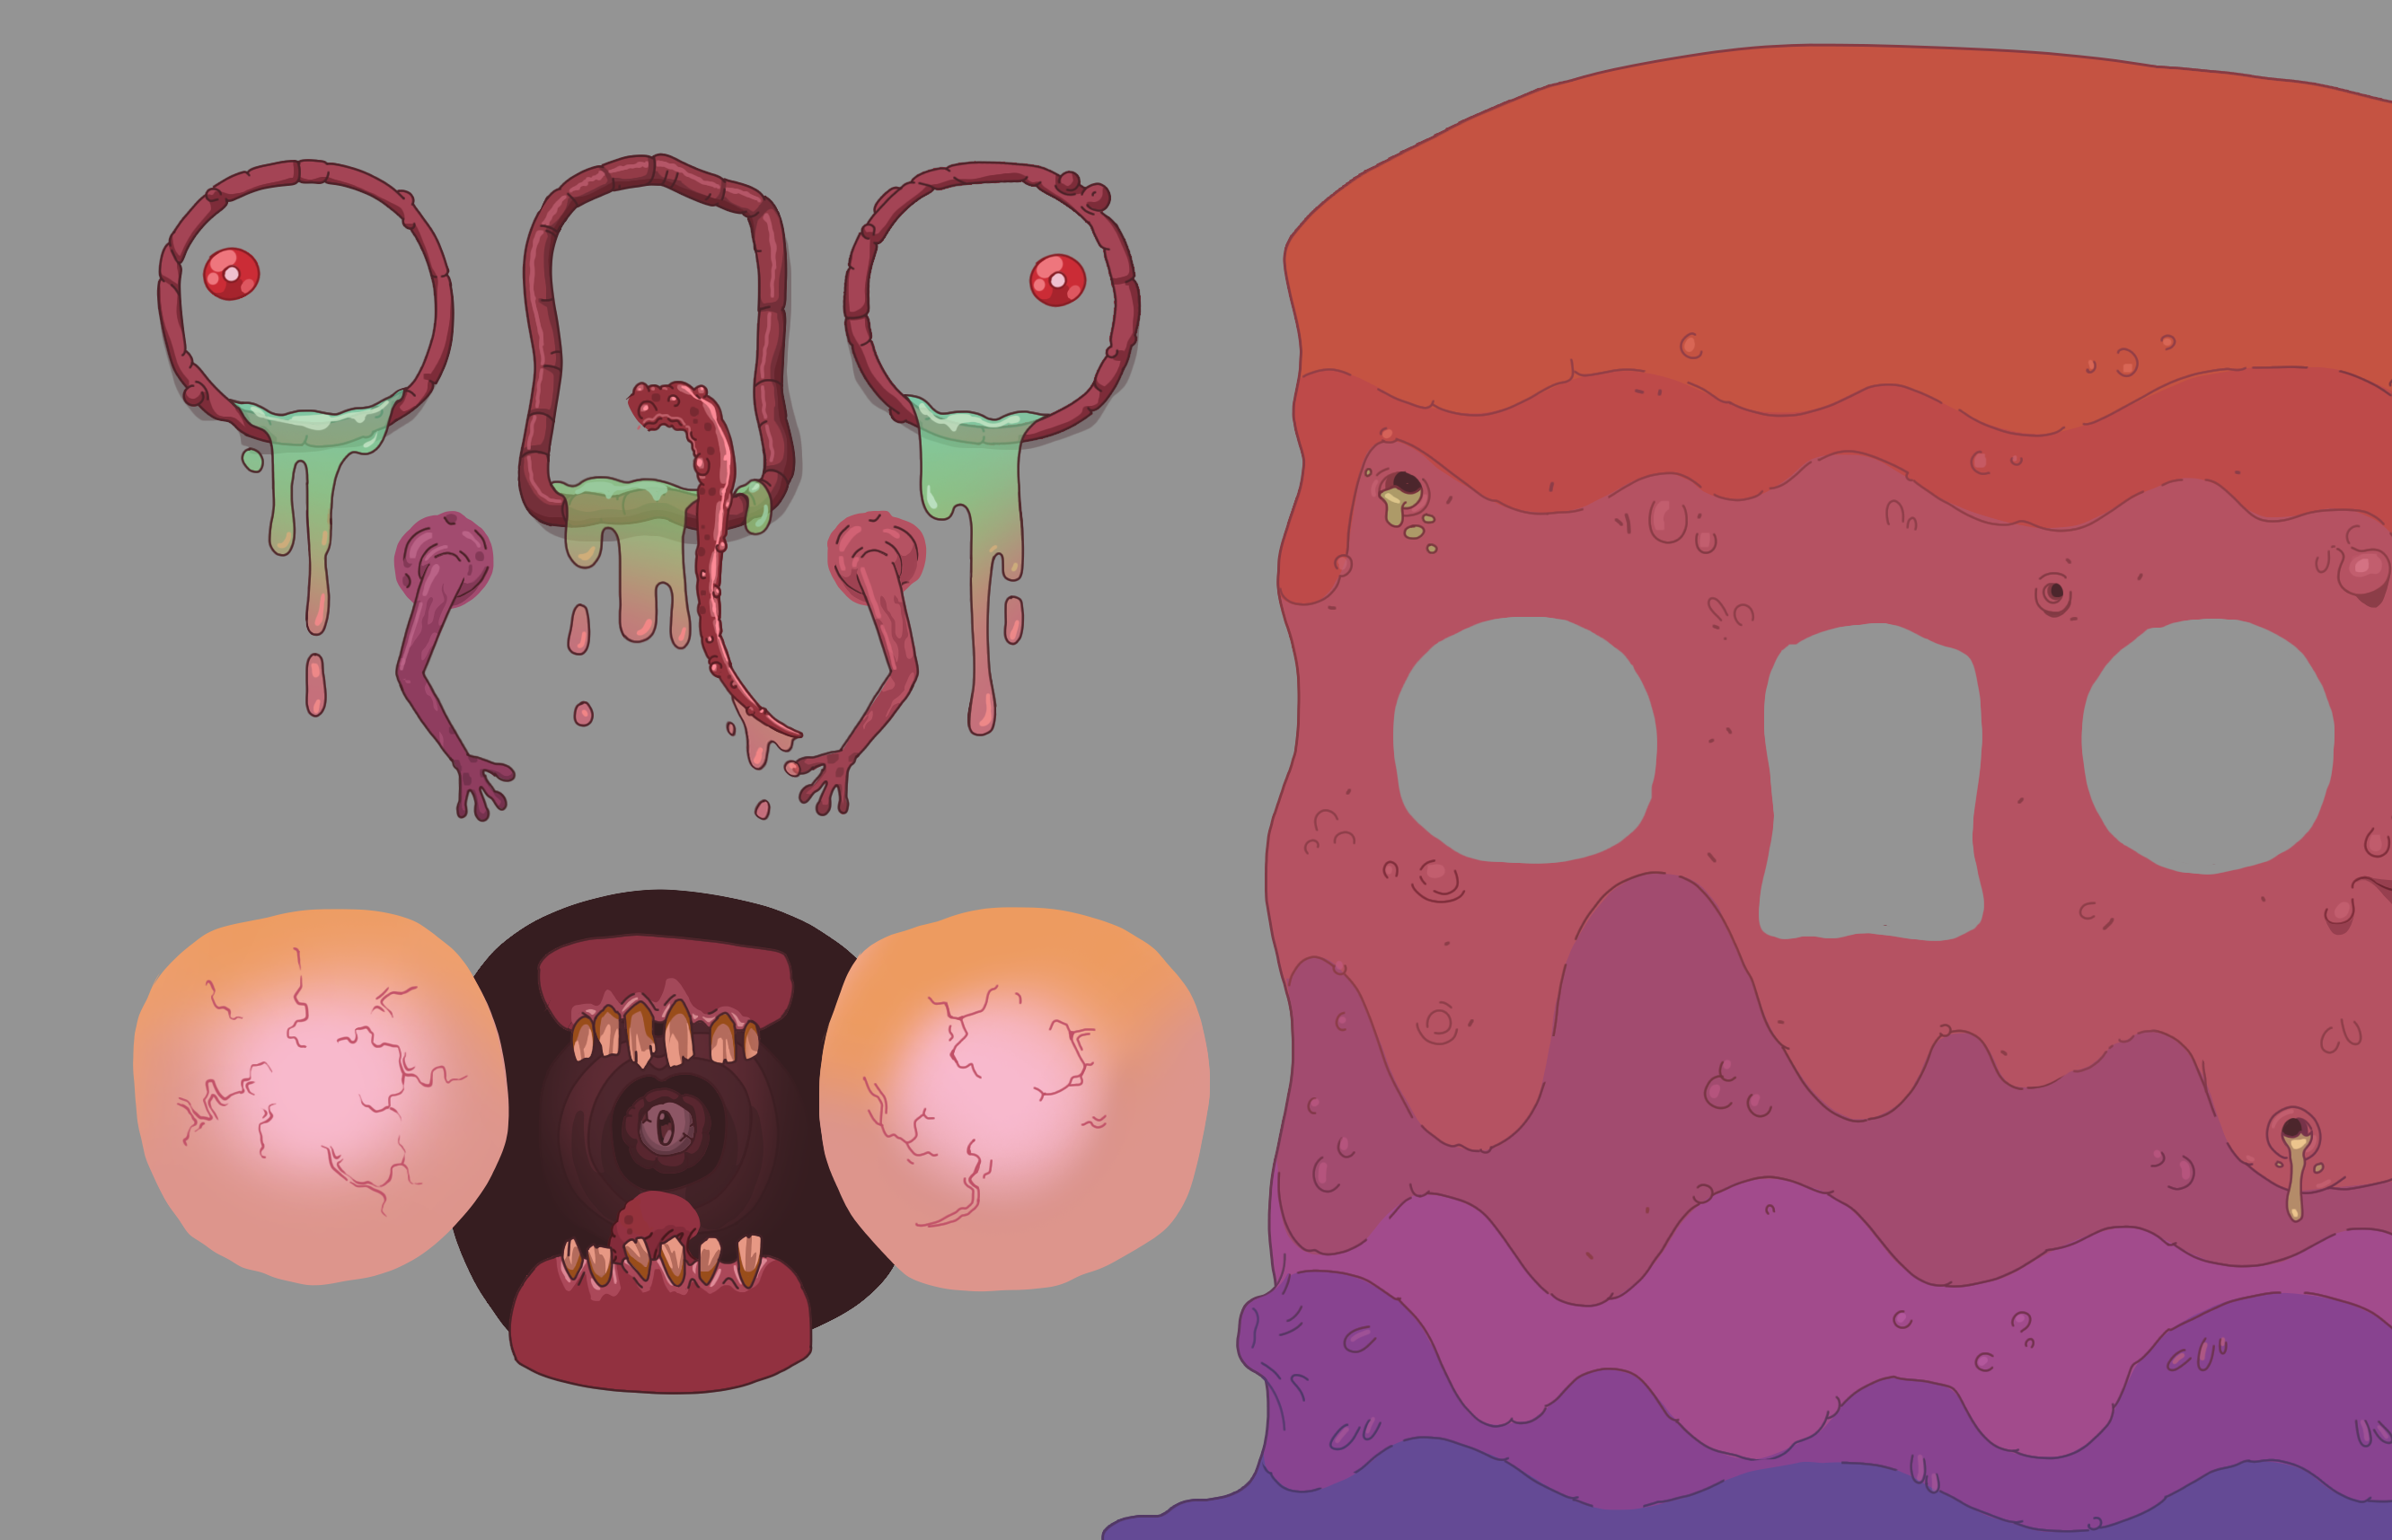
To make the eyes and mouth move more naturally, I split them in half. I do the same with the lips.
Tears/slime don’t need slicing, we just leave them as they are. I also paint the root of the tongue (it’ll sit behind the lips) and make a separate "closed-mouth" layer.
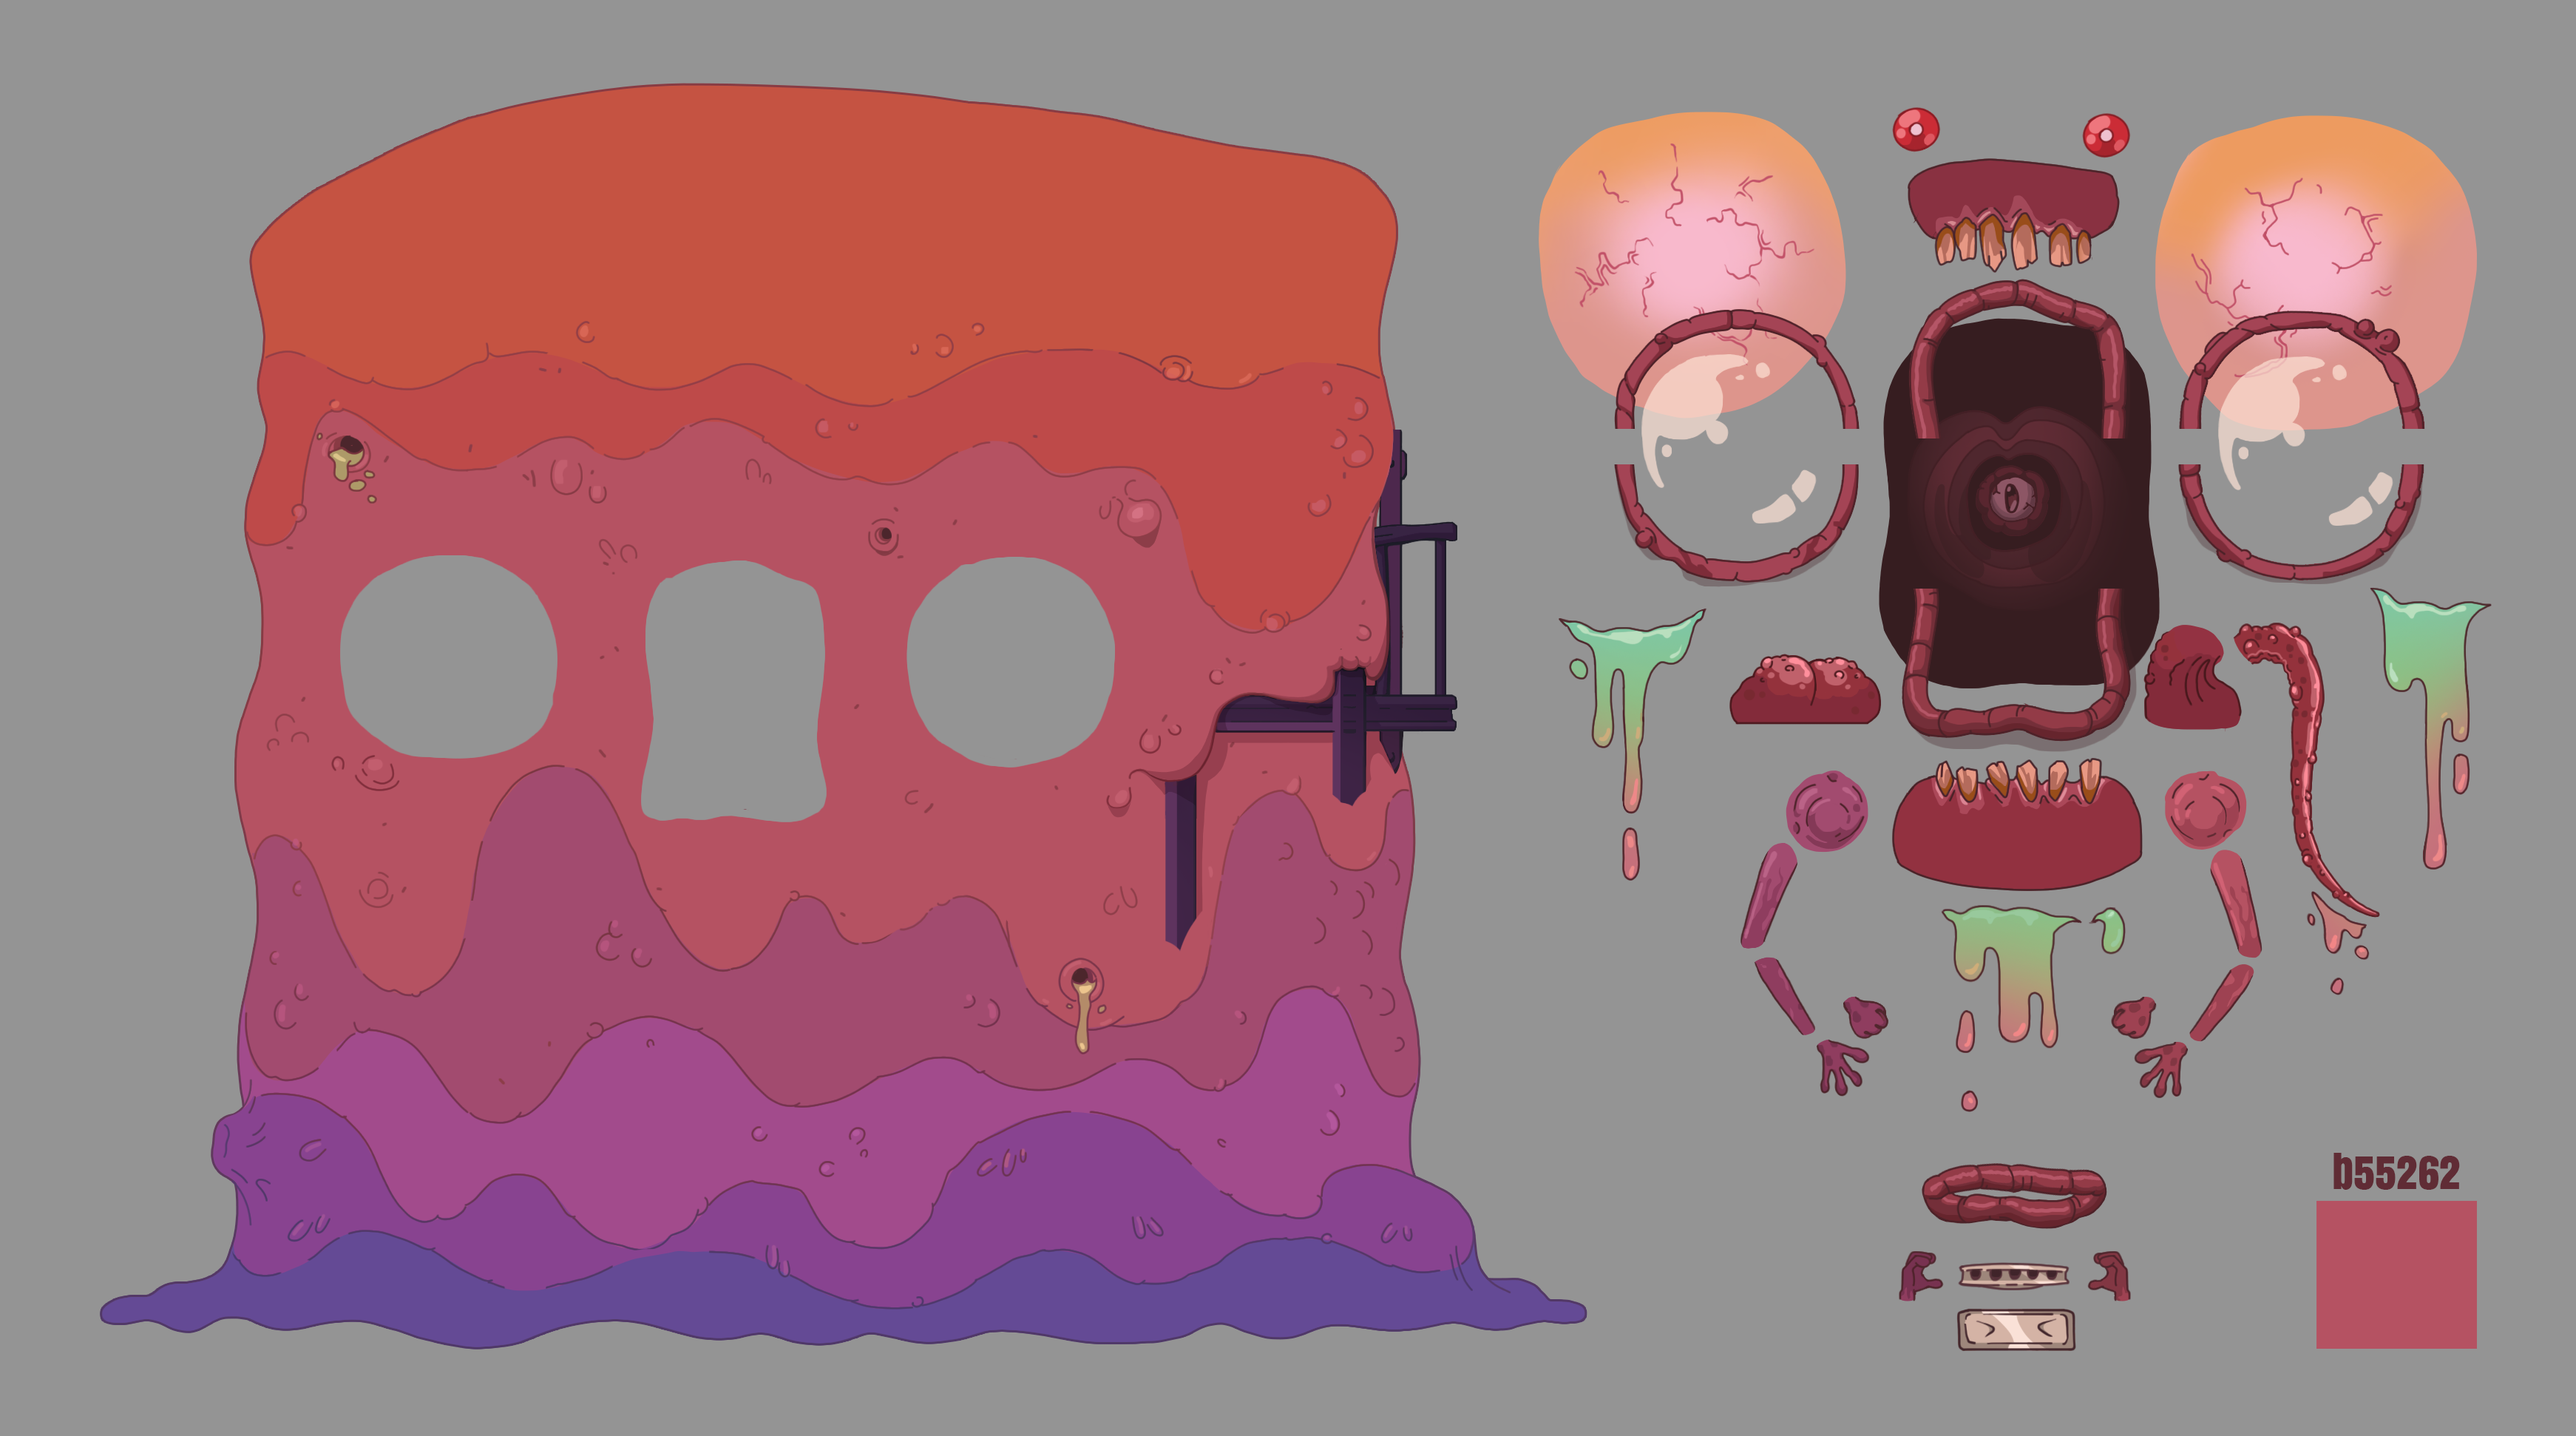
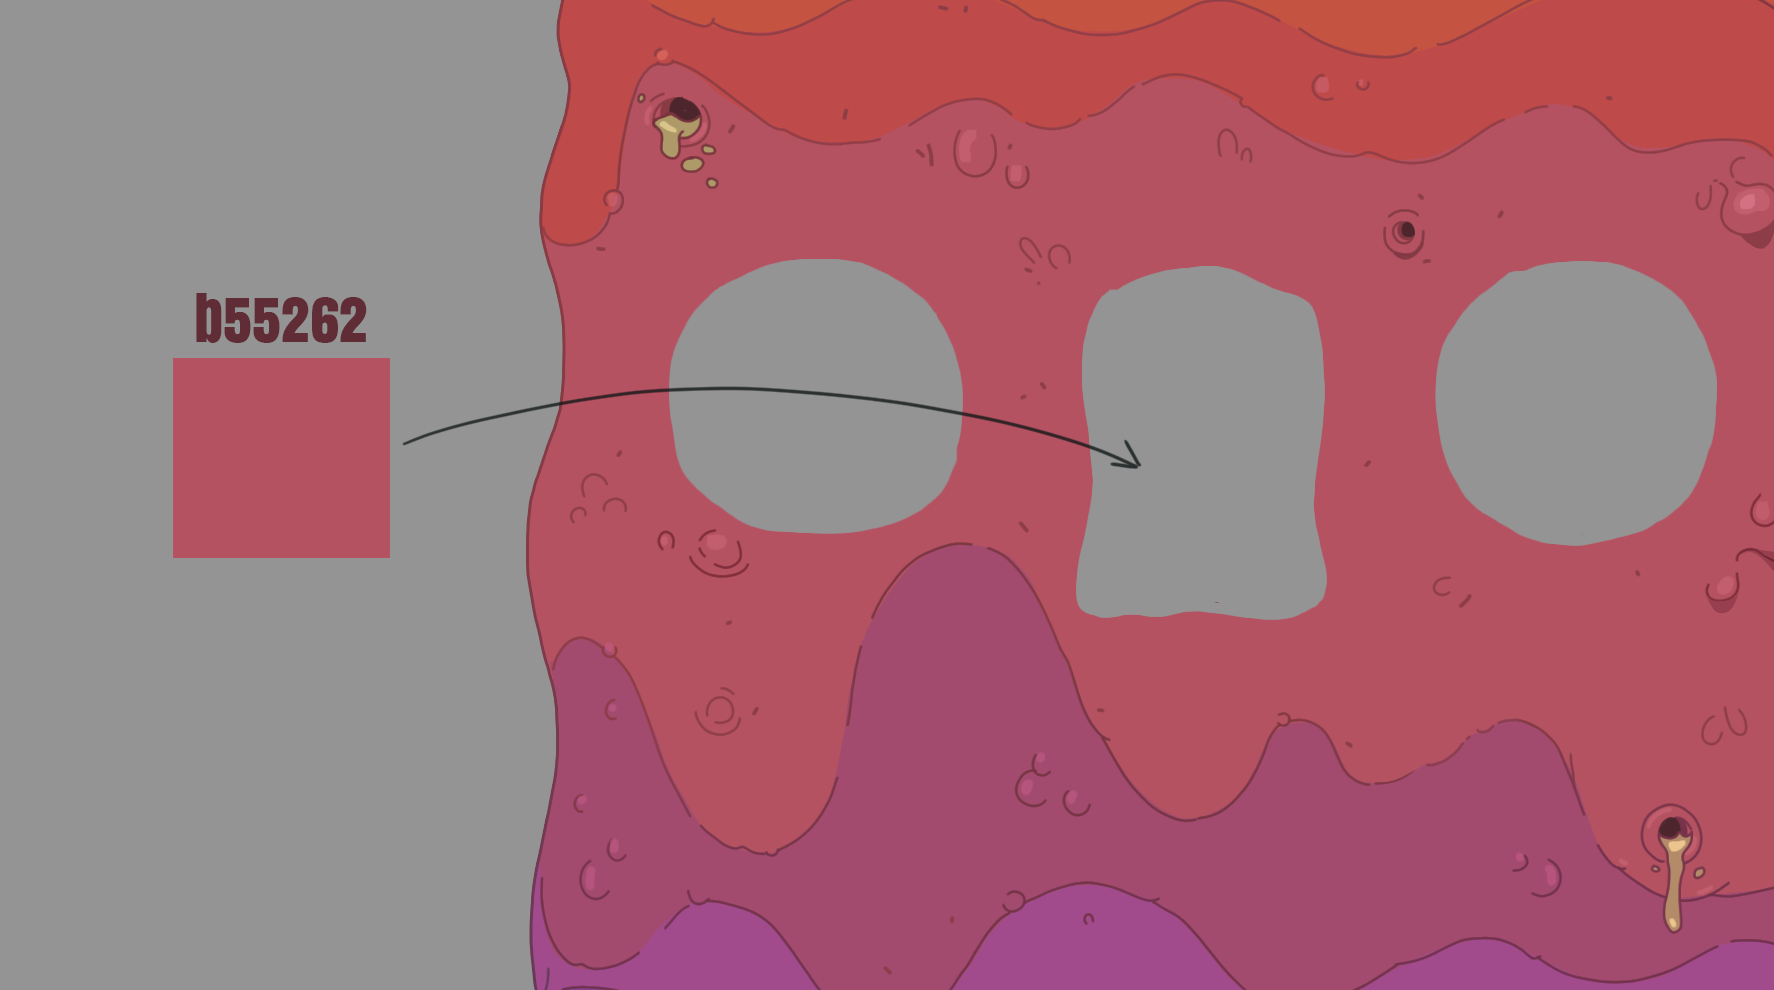
Plus, I add a little note with the color number, so the animator knows what to fill in around the lips when the mouth closes.
Later I also separated the veins from the eyeballs for more dynamic motion, and straightened the tongue, that helps Spine bones deform it properly (it’s easier to start with a straight one than a twisted shape).

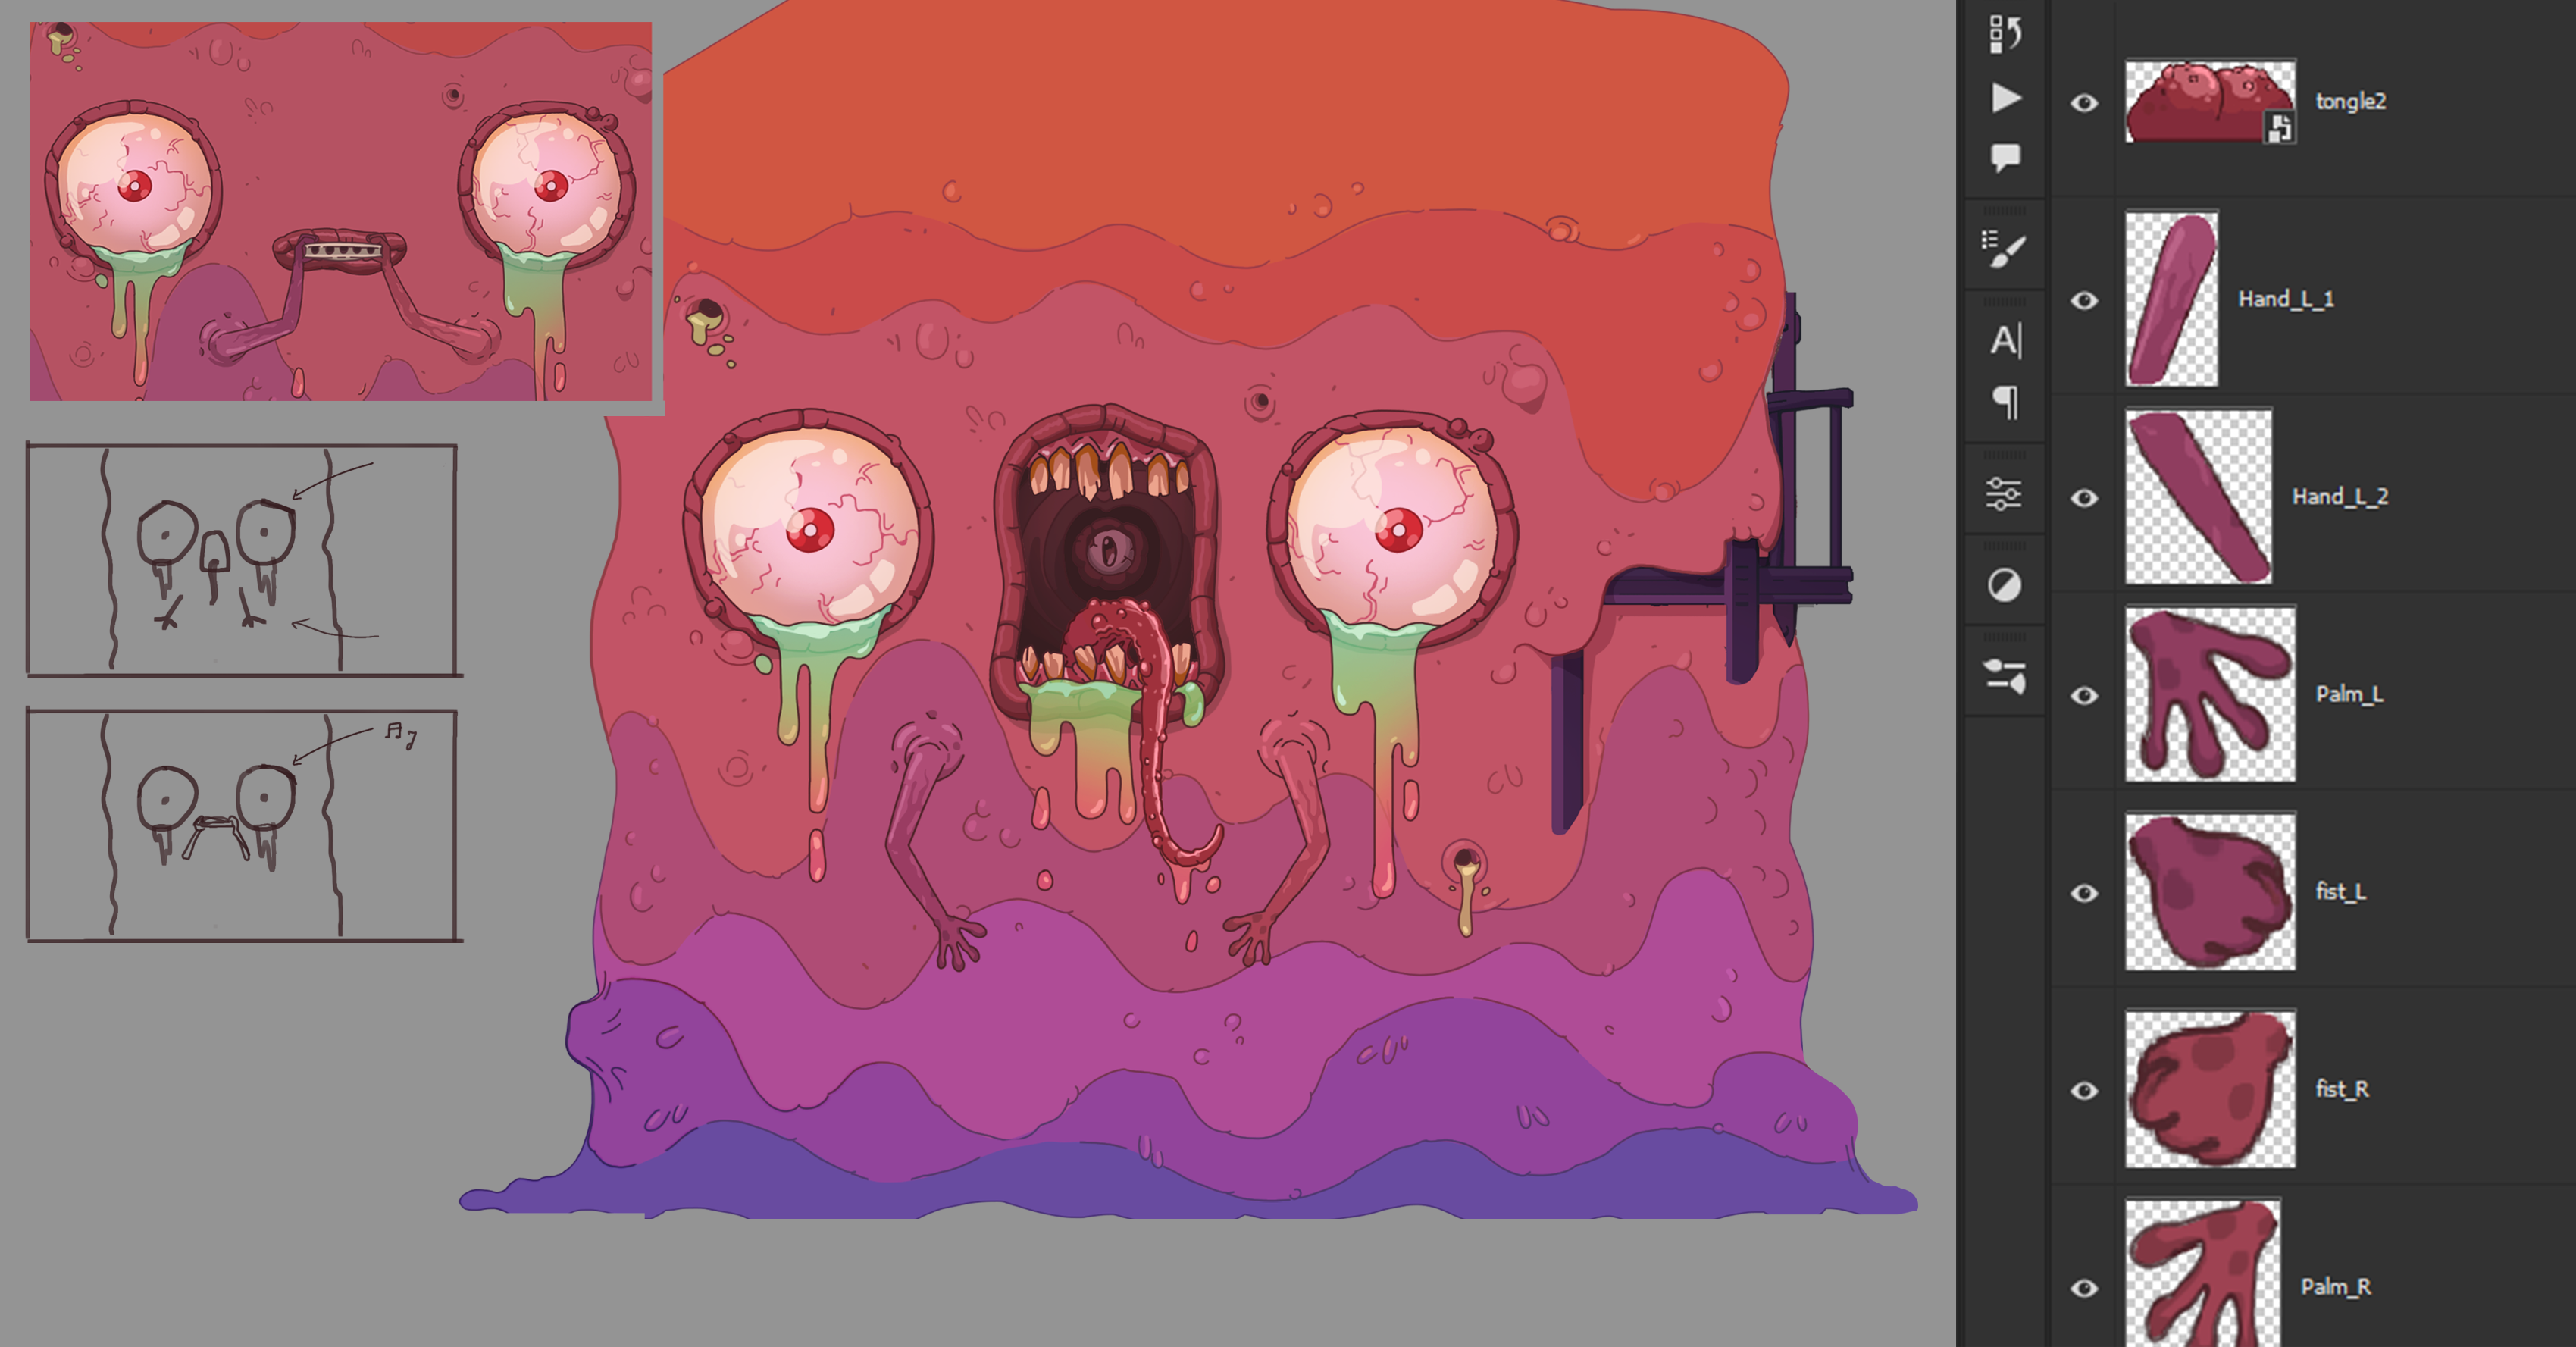
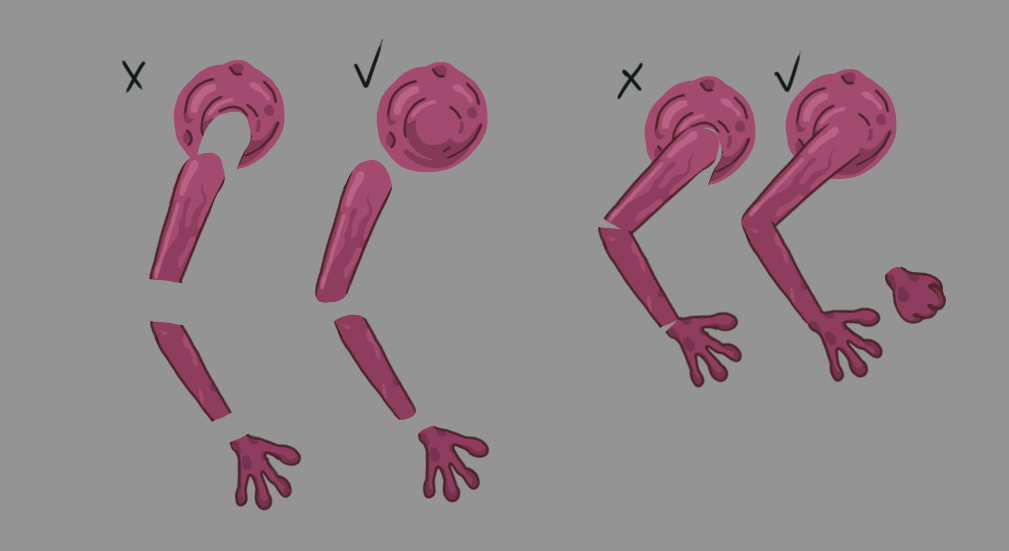
When slicing an arm, it’s not enough to just split it into 3-4 parts.
You also need to paint small connecting areas so there aren’t any gaps when the arm moves.
And don’t forget to fill in the background behind it (like under the shoulder).
Same goes for additional poses, like a clenched fist.
Once everything’s sliced and polished, it’s time for the most painful part: cleaning the PSD and naming layers.
I remove unnecessary stuff, merge groups (don't forget to save the PSD with layers for your future self), and try to name everything clearly enough that anyone could understand it later (It doesn’t always work out, but I try😅).
And here’s the result!
It’s not the final version yet, we’ll get back to polishing the motion later. But I think he’s come to life already! 🧡